Dynamics 365 is by far the most popular enterprise resource planning and customer relationship management application developed by Microsoft. Like any other platform, it also lets user import and export solutions created on dynamics suits. Following is the quick step by step process to import and export solution from Dynamics 365:
Import a solution from Dynamics 365:
You can import solutions manually using the steps below. However, keep in mind that you should only import solutions that you’ve obtained from a trusted source. Customizations might include code that can send data to external sources. You can import the default solution only to the organization from which you exported it, but not into a different organization.
- Go to Settings > and navigate to Solutions.
- In the solutions list menu, choose Import.
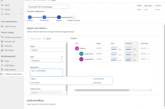
- In the Import Solution dialog, Select Solution Package step browse to the compressed (.zip or .cab) file that contains the solution you want to import.
- Choose Next.
- You can view information about the solution before you choose Import.
- You may need to wait a few moments while the solution import completes. If it is successful, you can view the results and choose Close.
- If you have imported any changes that require publishing, you must publish customizations before they will be available.
If the import isn’t successful, you will see a report showing any errors or warnings that were captured. You can choose Download Log File to capture details about what caused the import to fail. The most common cause for a solution import to fail is that the solution did not contain some required solution components.
When you download the log file, you will find an XML file that you can open using Office Excel and view the contents.
Export a solution from Dynamics 365:
When you are going to export solution, you always should export your unmanaged customizations periodically so that you have a backup in case anything happens. You cannot export managed solutions.
- Go to Settings > Solutions.
- In the list select the solution you want to export and choose Export.
- In the Publish Customizations step you will be reminded that only published customizations are exported and you will have the option to Publish All Customizations before you choose Next.
- If your solution contains any missing required components you will see the Missing Required Components step. You can disregard this warning only if you intend to import this as an unmanaged solution back into the original organization. Otherwise, follow the instructions in the dialog to cancel the export and add the required components.
- In the Export System Settings (Advanced) step you can choose certain system settings to include in your solution. If your solution depends on any of the groups of system settings, select them and choose next.
- See Settings options for solution export below for details about the settings that will be included with each option.
- In the Package Type step, you must choose whether to export the solution as an Unmanaged or Managed solution.
- The next step allows you to choose a target solution for a specific Dynamics 365 version. This option is typically used by ISVs who may want to export a solution that is compliant with a previous version. Unless you intend to import this solution into an organization that is not upgraded to the same version as the organization version you are using, accept the default.
- Choose Export to download the solution file.
- The exact behavior for downloading files varies between browsers.


