Not so long ago, Microsoft introduced an exciting extension to Office 365, known as Microsoft Flow. This is a cloud-based service that lets you create automated workflows between your favorite applications and services.
Microsoft Flow is especially useful for Dynamics 365 users because it enables them to create a workflow that automates time-consuming business tasks and processes without relying on IT departments and developers.
How does Microsoft Flow fit into Dynamics 365?
With the Dynamics 365 Connector, you can connect to create a flow that starts when an event occurs in Dynamics 365 or another service. This results in the action being performed in Dynamics 365 or another service, as well as the out-of-the-box Dynamic 365 Workflow feature.
However, since it is only available as an external service from Microsoft in Dynamics 365, it cannot be found natively in Dynamics 365. With this service, you can automate the integration of various applications through the workflow.
It is smooth and logical, and above all, it does not effectively require coding. Sometimes we use flows for things that cannot facilitate workflows.
What can be achieved with Microsoft Flow?
With the integration of Dynamics 365 and Microsoft Flow you can develop new features. When using Microsoft Flow, power users who need these new features but do not have advanced developer skills can create workflows that are not easily accessible using the standard Dynamics 365 workflow capabilities. These features include the following.
1. Automate process approval
With the Microsoft Flow Approval feature, you can use the Approval Center to approve email, push notifications, and even the Flow application. You can quickly and easily create a process approval workflow without having to log in to Dynamics 365.
2. Connect to data through applications and platforms
You can automate the integration of Dynamics 365 with other applications such as SharePoint, One Drive, Azure service, Dropbox, and even social platforms. This is of great benefit to improve cooperation and interaction.
For example, I have a table that contains all the records that meet certain criteria, but I do not want to export to Excel. Whenever you create a record in CRM, simply create a data flow to update the Excel spreadsheet with Dropbox or One Drive.
3. Create a personalized workflow
Although you can use the Dynamics 365 workflow to create personalized workflows, this interface may be confusing for non-developer users. Meanwhile, Microsoft Flow offers a simple option with a user-friendly interface that users can use and understand right away.
4. Delete records
In Microsoft Flow, you can retrieve a list of records and delete records by performing a task for each record in the list. However, this cannot be achieved with the standard Dynamics 365 workflow.
However, to be able to use this feature, users’ security roles must allow the deletion of Dynamics 365 records. Note also that this feature should be used with care not to delete erroneous data.
How can I use Microsoft Flow with Dynamics 365?
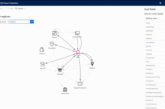
To use Microsoft Flow with Dynamics 365, you need a connector. The connector acts as a proxy to enable the communication of Dynamic 365. This works by giving users the ability to connect their accounts and create their own applications and workflows using a set of predefined actions and triggers.
You can then create a flow using the templates available in Microsoft Flow or create a new one from scratch if the template cannot be used for its intended use.
To better understand Microsoft Flow, consider a scenario where tasks are created each time a lead is created in Dynamics 365.
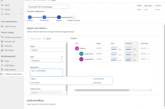
- Log in to the Microsoft Portal and click the “Flow” tile to start the application. This will take you to the Microsoft Flow website.
- Click or tap My flow and click or tap Create from blank.
- Click or tap Dynamics 365 in the flow trigger list – When creating records.
- Log in to Dynamics 365 when prompted.
- Under Organization Name, select the Dynamics 365 instance for which you want to listen for flows.
- Under Entity Name, select the entity you want to hear. This serves as a trigger to start the flow.

- Click or tap New Step, then click or tap Add Action.

- Click Dynamics 365 – Make a new record.
- Under Organization Name, select the Dynamics 365 instance for which the flow should create records. Note that the event does not have to be the same instance.
- Under Entity Name, select the entity for which you want to create a record when you click Select Task.
- The subject field is displayed. Click to display a page where you can select the field to insert in the Subject field of the task when the task is created.
- Then press Save Flow to complete the process.
Once the workflow is deployed, it runs in the background, and the user can follow the flow’s execution history and the detailed error log for troubleshooting.
However, the greater the number of concurrent flows, the greater the impact on system performance of the Dynamics 365 application. The performance must therefore be taken into account.
With Microsoft Flow, you can automate integration with business processes, especially external services, easily access valuable data to meet your business needs and requirements, and save time that would be required manually. This gives you a great opportunity to do more and improve the productivity of your organization.


